

Building Your Shipment
5. Building Your Shipment Step-by-Step
Step 1: General Shipment Details
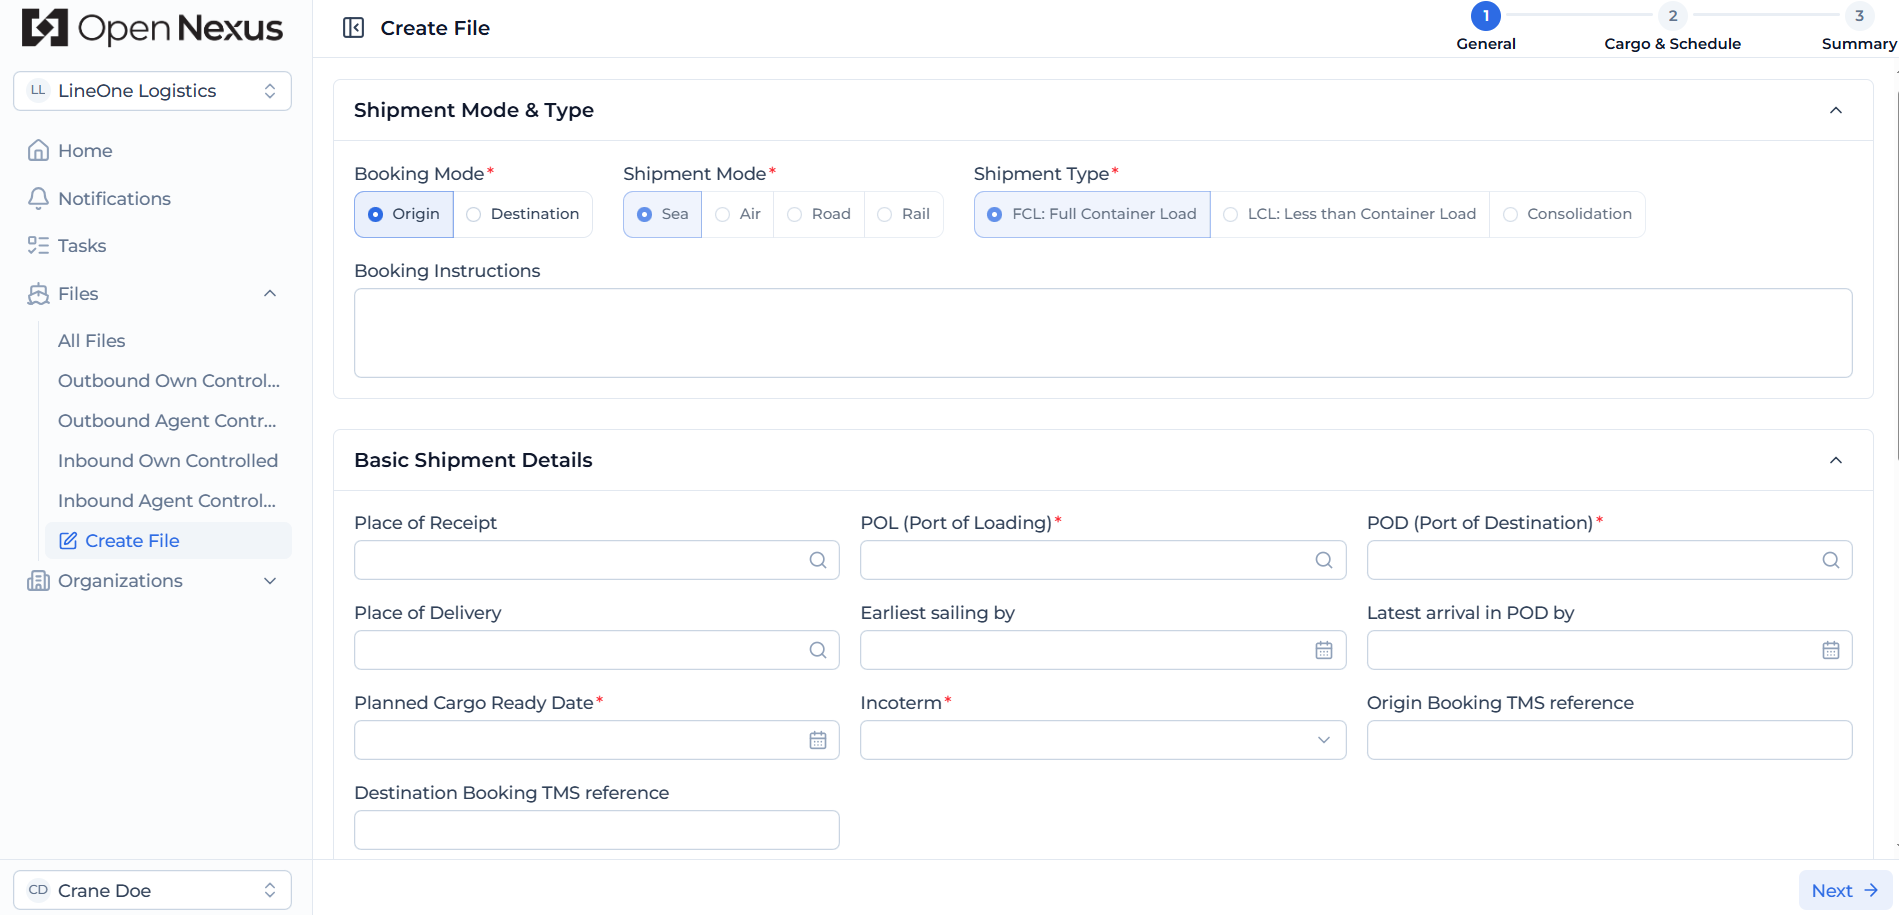
You begin by defining the operational foundation of the shipment.
For the current release, Open Nexus supports:
- Transport Mode: Sea
- Shipping Type: FCL (Full Container Load)
Additional transport modes and shipping types will be supported in the future.
You will enter:
- Cargo Ready Date (date when cargo is available for pick-up)
- POL (Port of Loading)
- POD (Port of Discharge)
- Incoterms
These are critical inputs because they determine how the shipment will be planned and executed.
Hint:
The POL and POD you define here will automatically flow into your schedule later — you won't need to re-enter them.
Step 2: Add Shipment Parties
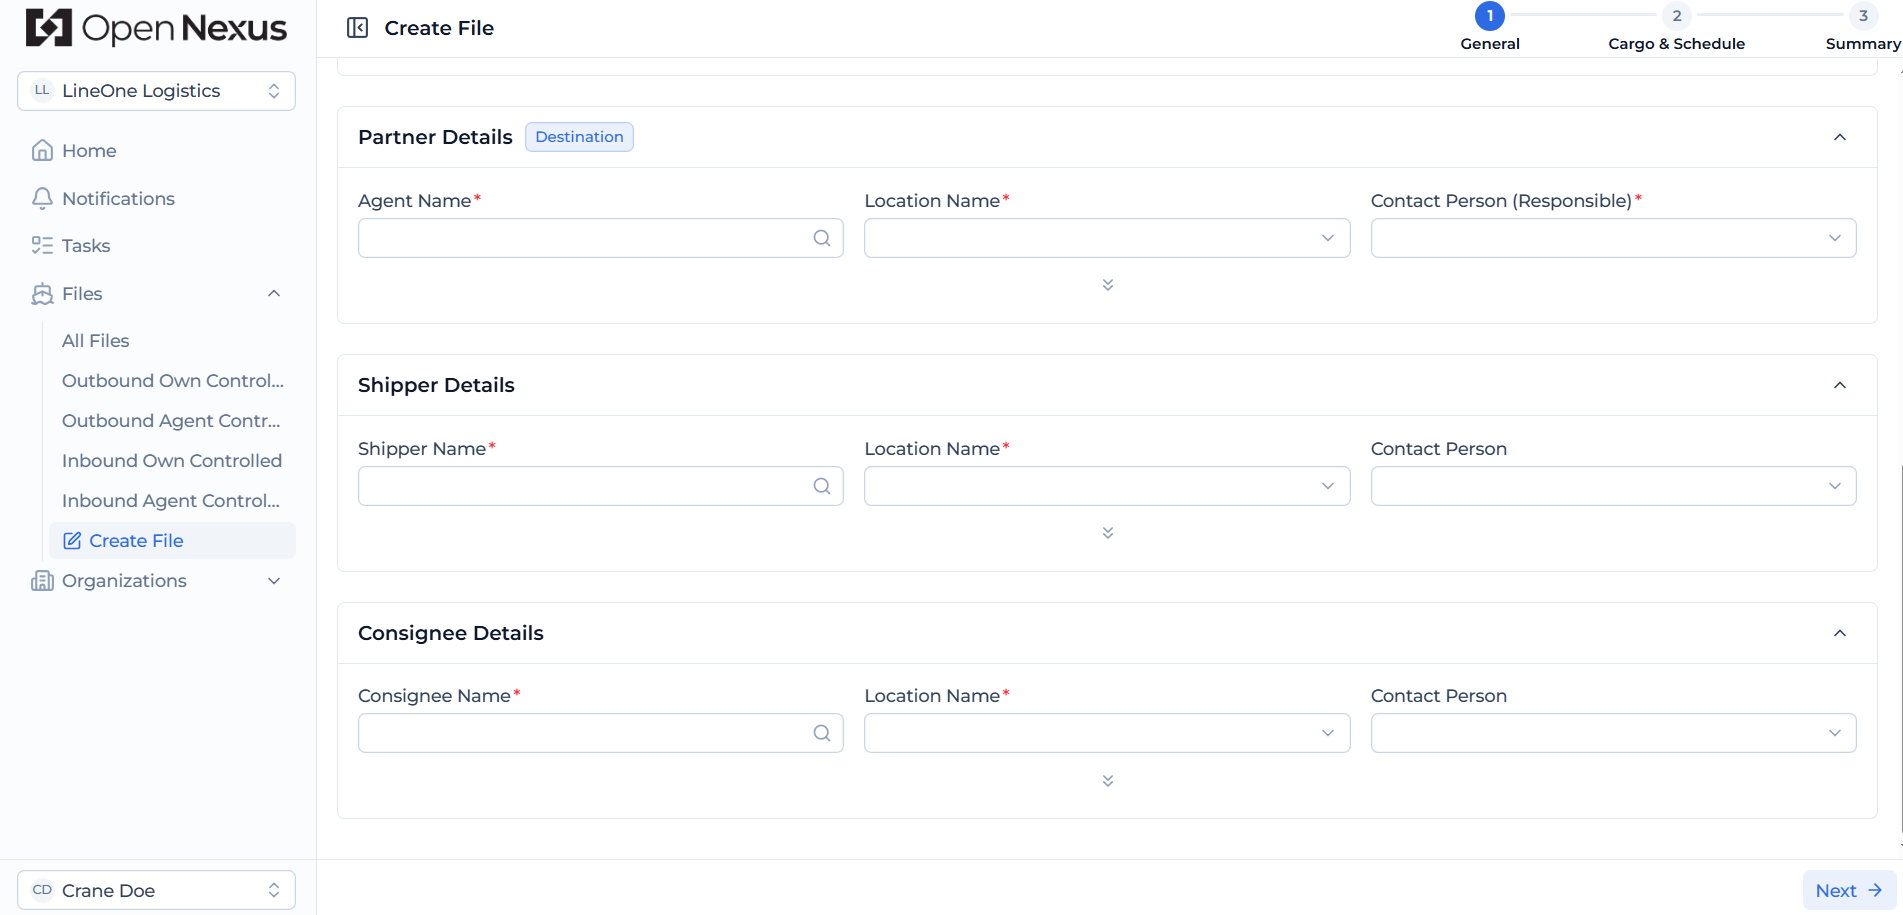
Now you define who is involved in the shipment.
You will select:
- Freight Forwarding Organization (Partner Side)
- Shipper (sender of goods)
- Consignee (receiver of goods)
Freight Forwarding Organization Logic
- If you are creating the file from the origin side, you will enter the destination freight forwarder
- Your own organization details are automatically pre-filled and not shown.
Important:
- Freight Forwarding Organizations currently must be claimed tenants
- They are selected from your Private Directory
- They cannot be created manually in the organization contact directory
Step 3: Container Details
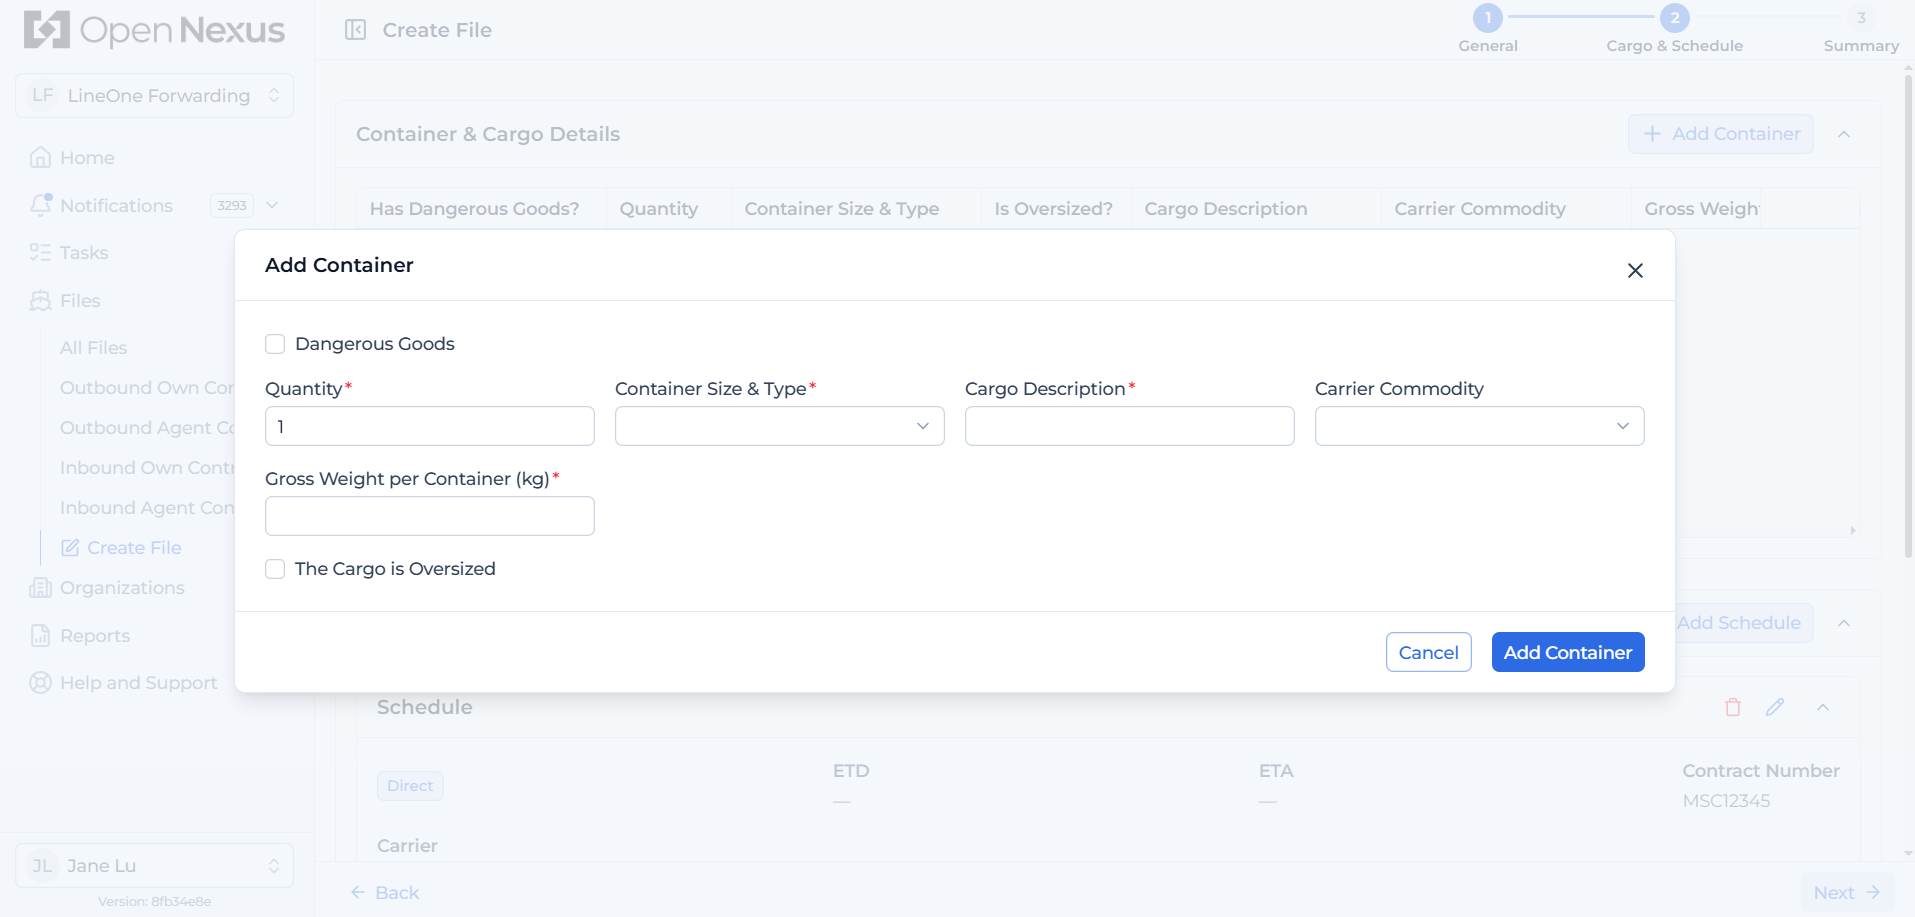
Here you define the physical shipment:
- Quantity – number of containers
- Container Size & Type (e.g. 20FT GP, 40FT GP)
- Cargo Description
- Carrier Commodity
- Gross Weight per Container (kg)
- Dangerous Goods – select this checkbox if the cargo contains dangerous goods; additional Dangerous Goods fields will appear for completion.
- The Cargo is Oversized – select this checkbox if the cargo is oversized; additional oversized cargo fields will appear for completion.
All fields are required except Carrier Commodity, Dangerous Goods, and The Cargo is Oversized.
Hint:
If the commodity is not listed, select "Freight All Kinds". For mixed cargo types, select "NVOCC Consolidated Cargo."
Step 4: Schedule Details (Manual Entry)
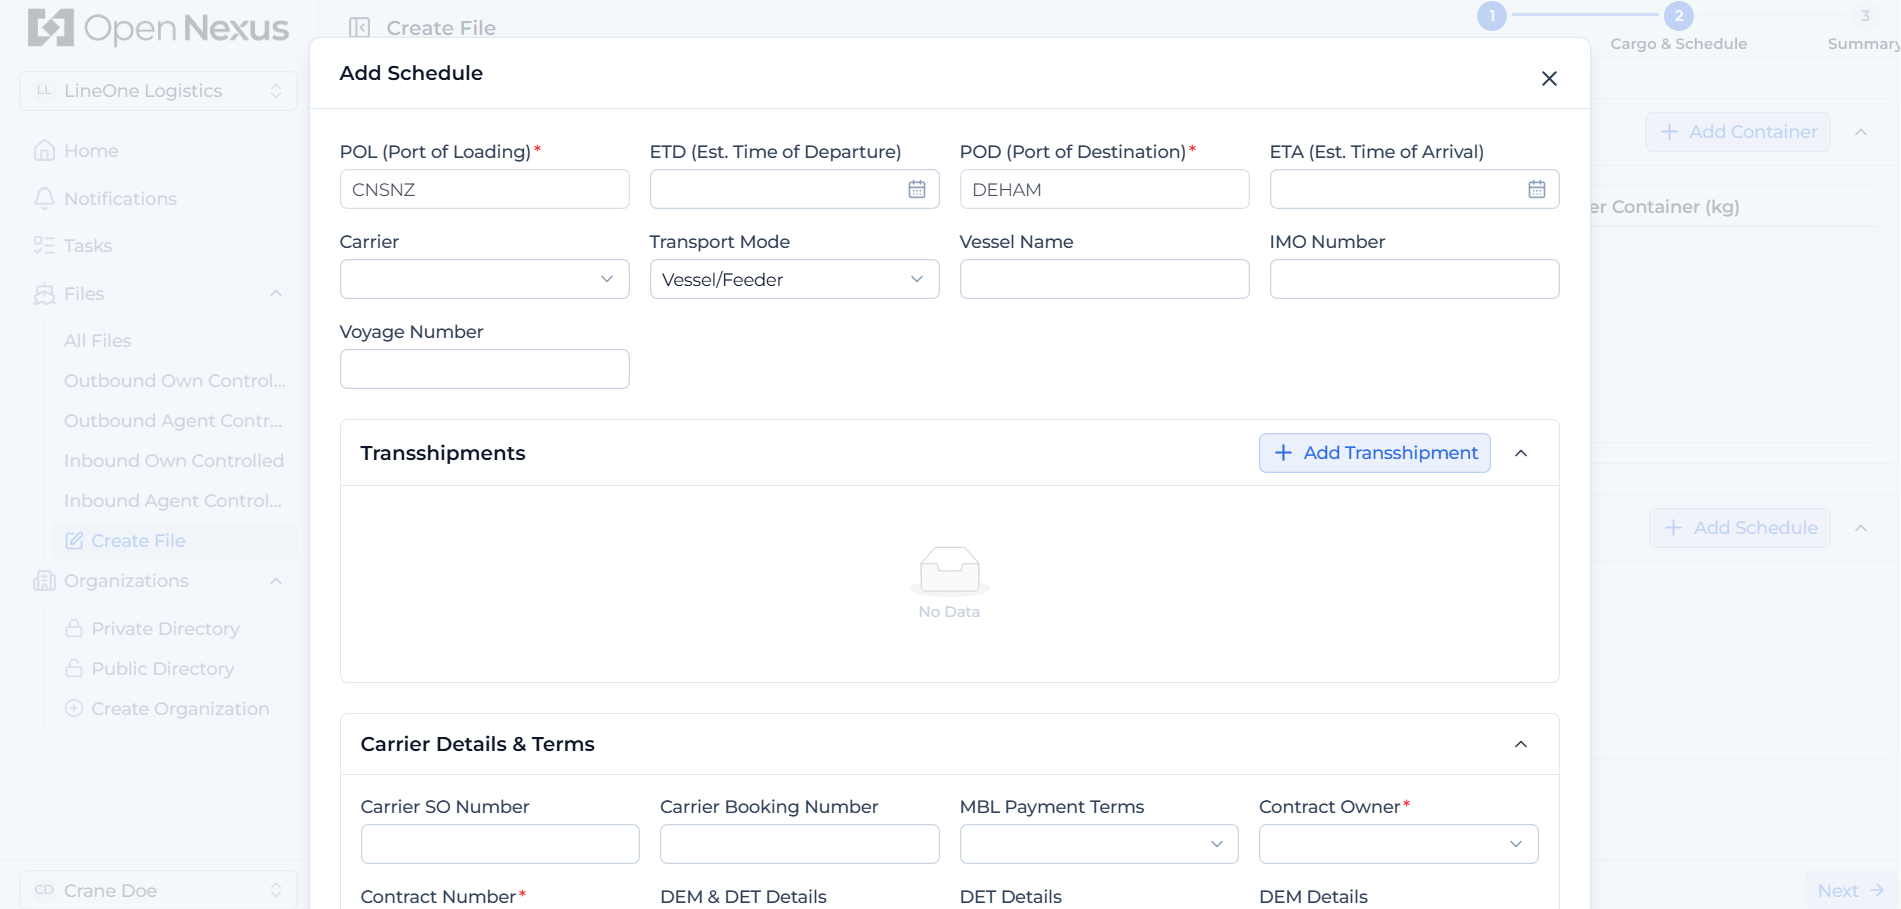
Now you define how the shipment will move operationally.
Some data is already pre-filled:
- POL and POD (from Step 1)
You will now add:
- Carrier details (if known)
- Vessel details (if known)
- ETD / ETA
- Freight Terms
- Transshipment details (if applicable)
- Rates (if available/ necessary)
Hint:
Think of this step as converting your shipment plan into an executable transport schedule.
Step 5: Create the Booking File
Once completed:
- Submit the file
- The Booking File is created and becomes Active
At this point, the system automatically:
- Generates Default Tasks
- Enables communication
- Allows document uploads