

Views & Filters
11. Tracking Work Through Views, Filters & Sorting
Open Nexus tables provide tools to help you organize and customize how information is displayed, focus on the records relevant to you, and quickly find what you need.
You can use Saved Views to save preferred table setups, Column Customization to select and rearrange displayed columns, Column Width Adjustment to resize columns, Advanced Filters to narrow down results, and Sorting to control the order in which records are displayed.
Booking File View Table
The Booking File View Table is your operational overview of shipments within your organization.
You can see:
- All Booking Files within your organization tenant.
- Key shipment information.
- File status (Active, Completed, Cancelled).
Pre-set Views
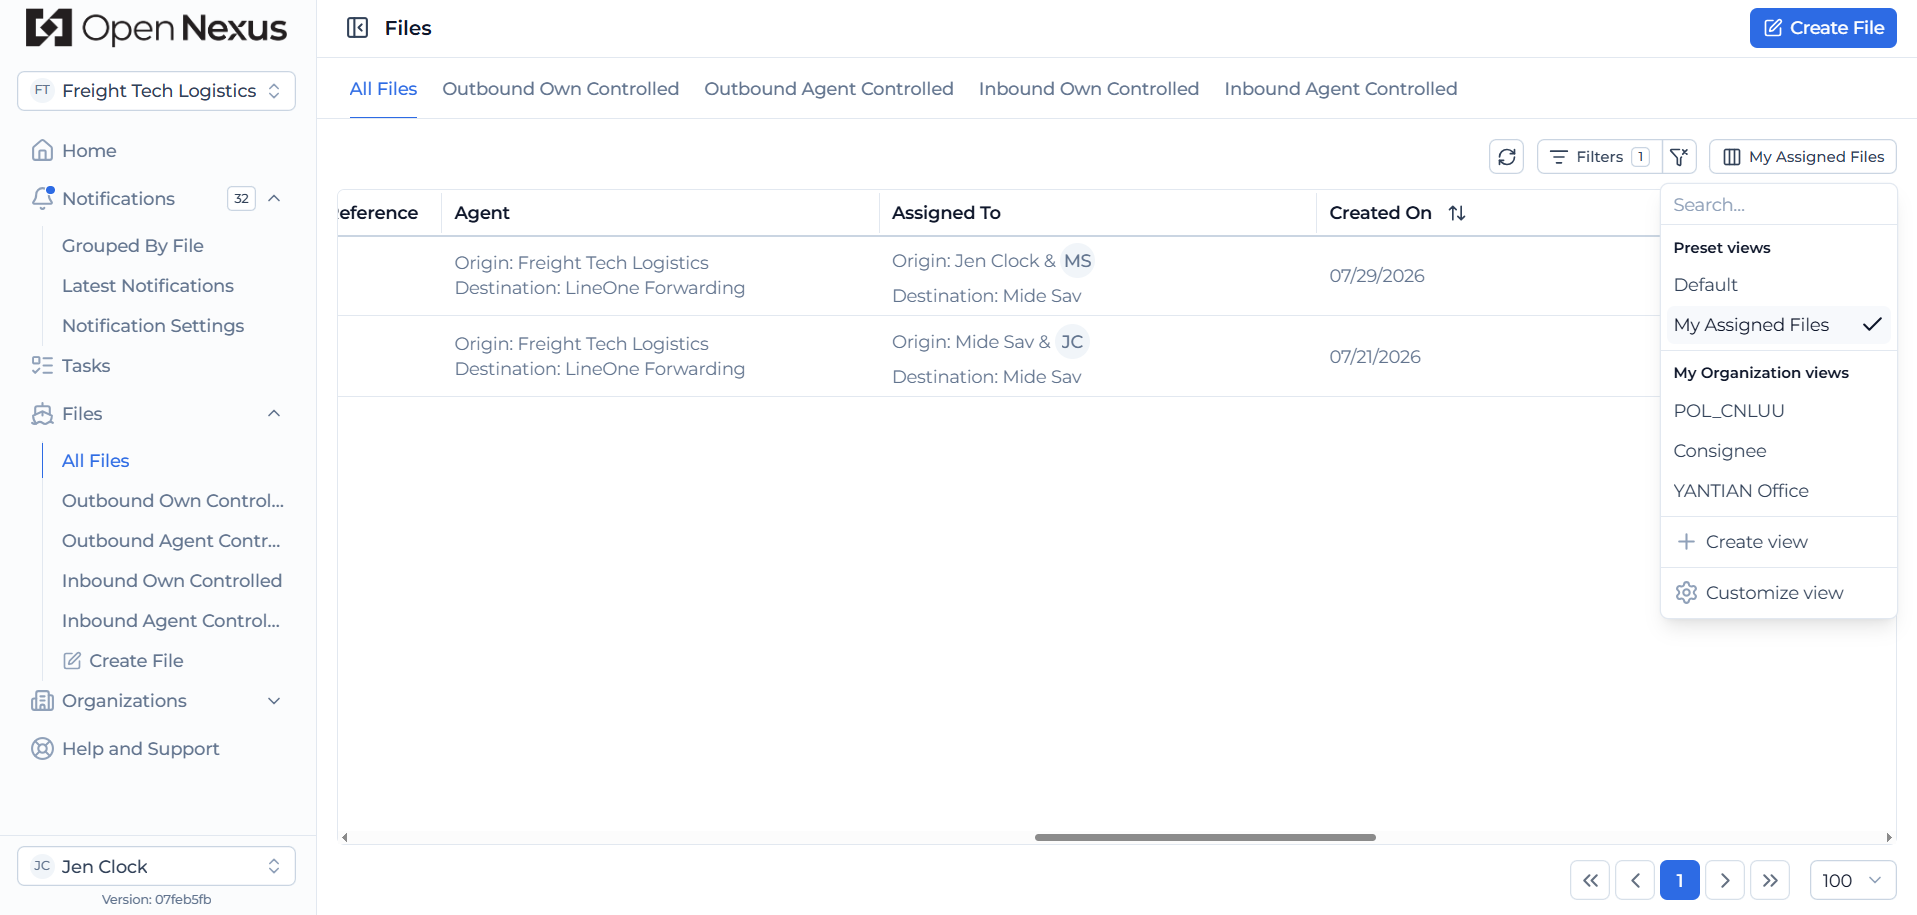
The Booking File View Table includes two pre-set views:
- Default – Displays all Booking Files within your organization.
- My Assigned Files – Displays Booking Files where you are assigned to the file.
Hint:
The Default and My Assigned Files views cannot be customized. Filters applied to these views are temporary and will be lost when the page is refreshed.
Saved Views
Saved Views allow you to create personalized table views based on the information you need for a particular workflow.
You can select your preferred columns by turning columns on or off, arrange the displayed columns in your preferred order, and apply filters and sorting to create a table setup you can return to later.
Creating a Saved View
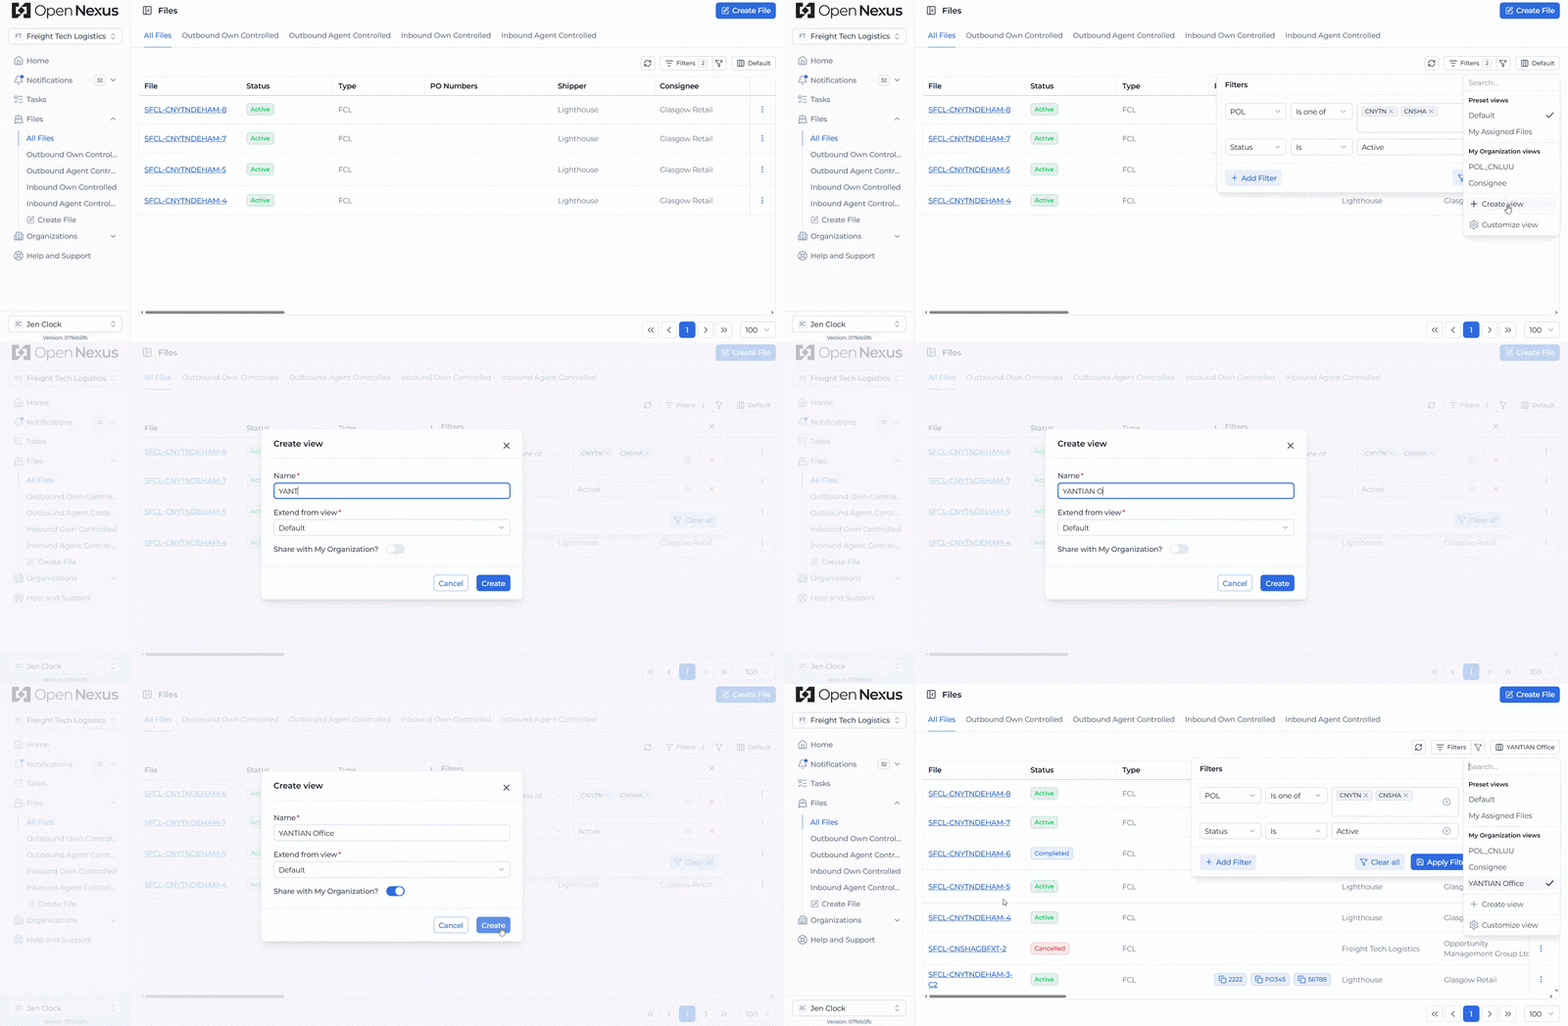
- Click the View button showing the name of your current view. If no additional Saved View has been created, the current view is Default.
- Scroll towards the end of the dropdown list and click Create View, located above Customize View.
- Enter the details for your new view and choose whether it is for your personal use or shared with your organization.
- Save the view to create it.
- Once created, apply your preferred columns, filters, and sorting to the Saved View
Hint:
Filters can only be saved on views you have personally created or views shared with your organization. Filters applied to the pre-set Default or My Assigned Files views are not saved.
Column Customization
Column customization allows you to choose which information is displayed in the table and arrange the columns in your preferred order.
To customize your columns:
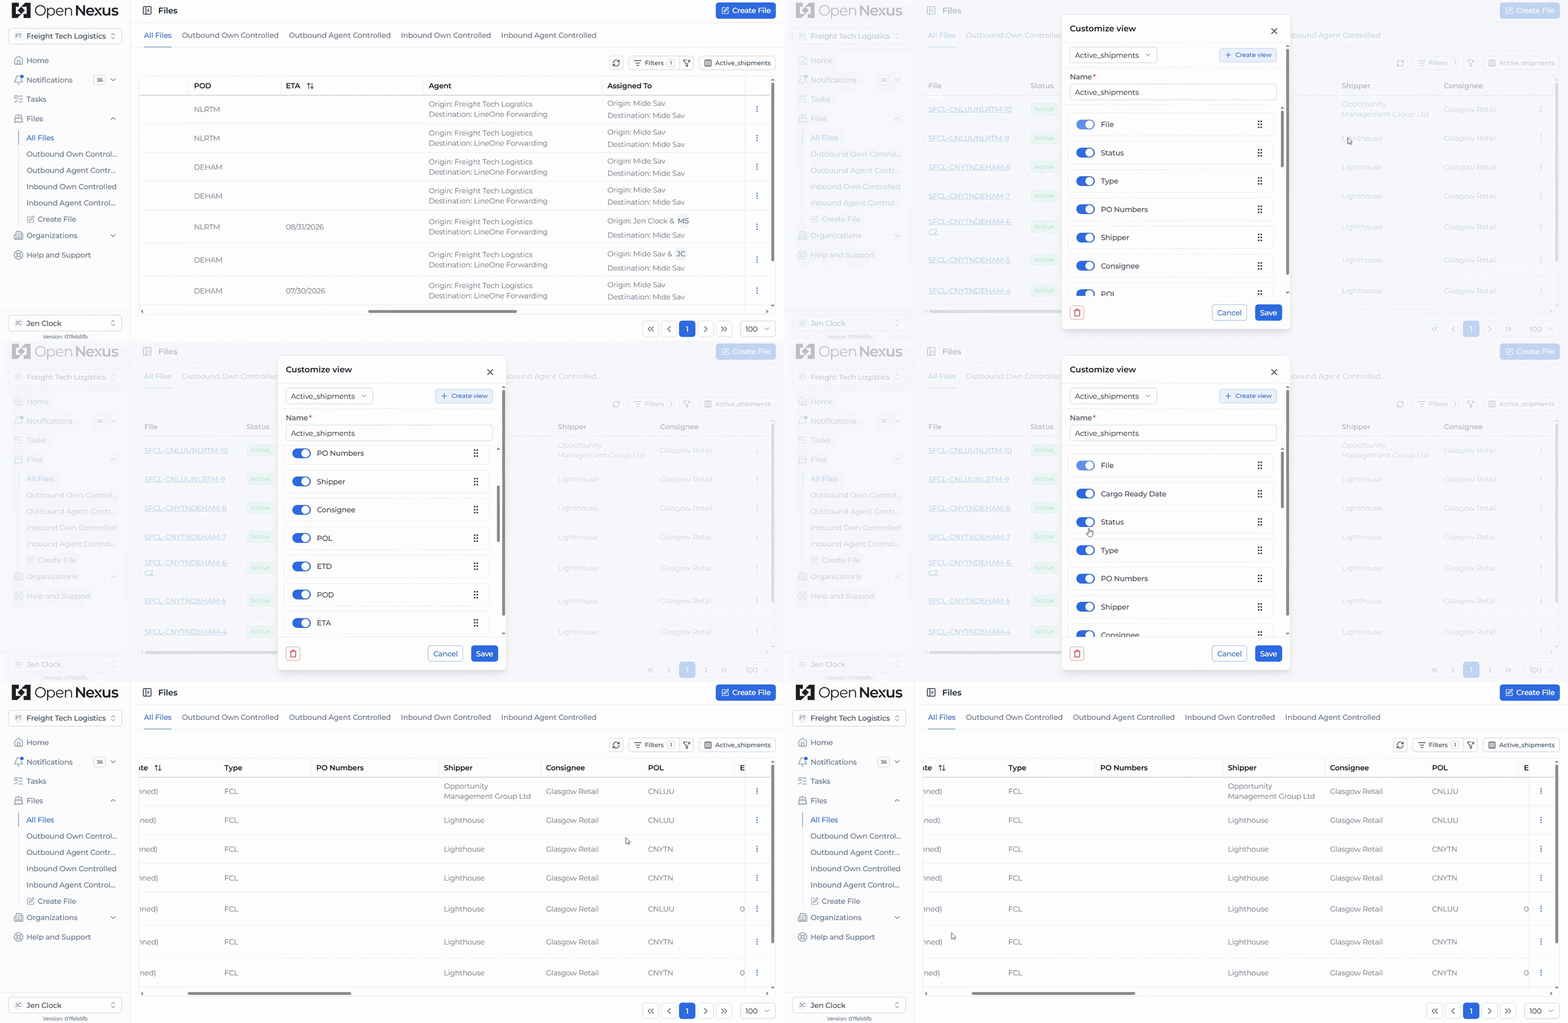
- Click the View button showing your current view.
- Scroll down the dropdown list and click Customize View.
- Turn columns on or off to choose which columns are displayed in the table.
- Drag the dotted handle beside a column to move it to your preferred position.
- Save your changes to update the view.
Column customization is available for Saved Views you can edit. The pre-set Default and My Assigned Files views cannot be customized.
Column Width Adjustment
You can also adjust the width of table columns to make the information easier to view.
Drag the edge of a column header to increase or decrease its width. Your column width adjustments are stored locally in your browser, so your preferred widths are retained when you return using the same browser.
Hint:
Column width adjustments are stored locally in your browser and are not part of your Saved View.
Advanced Filters
Advanced Filters allow you to narrow down the information displayed in a table based on specific criteria.
Applying a Filter
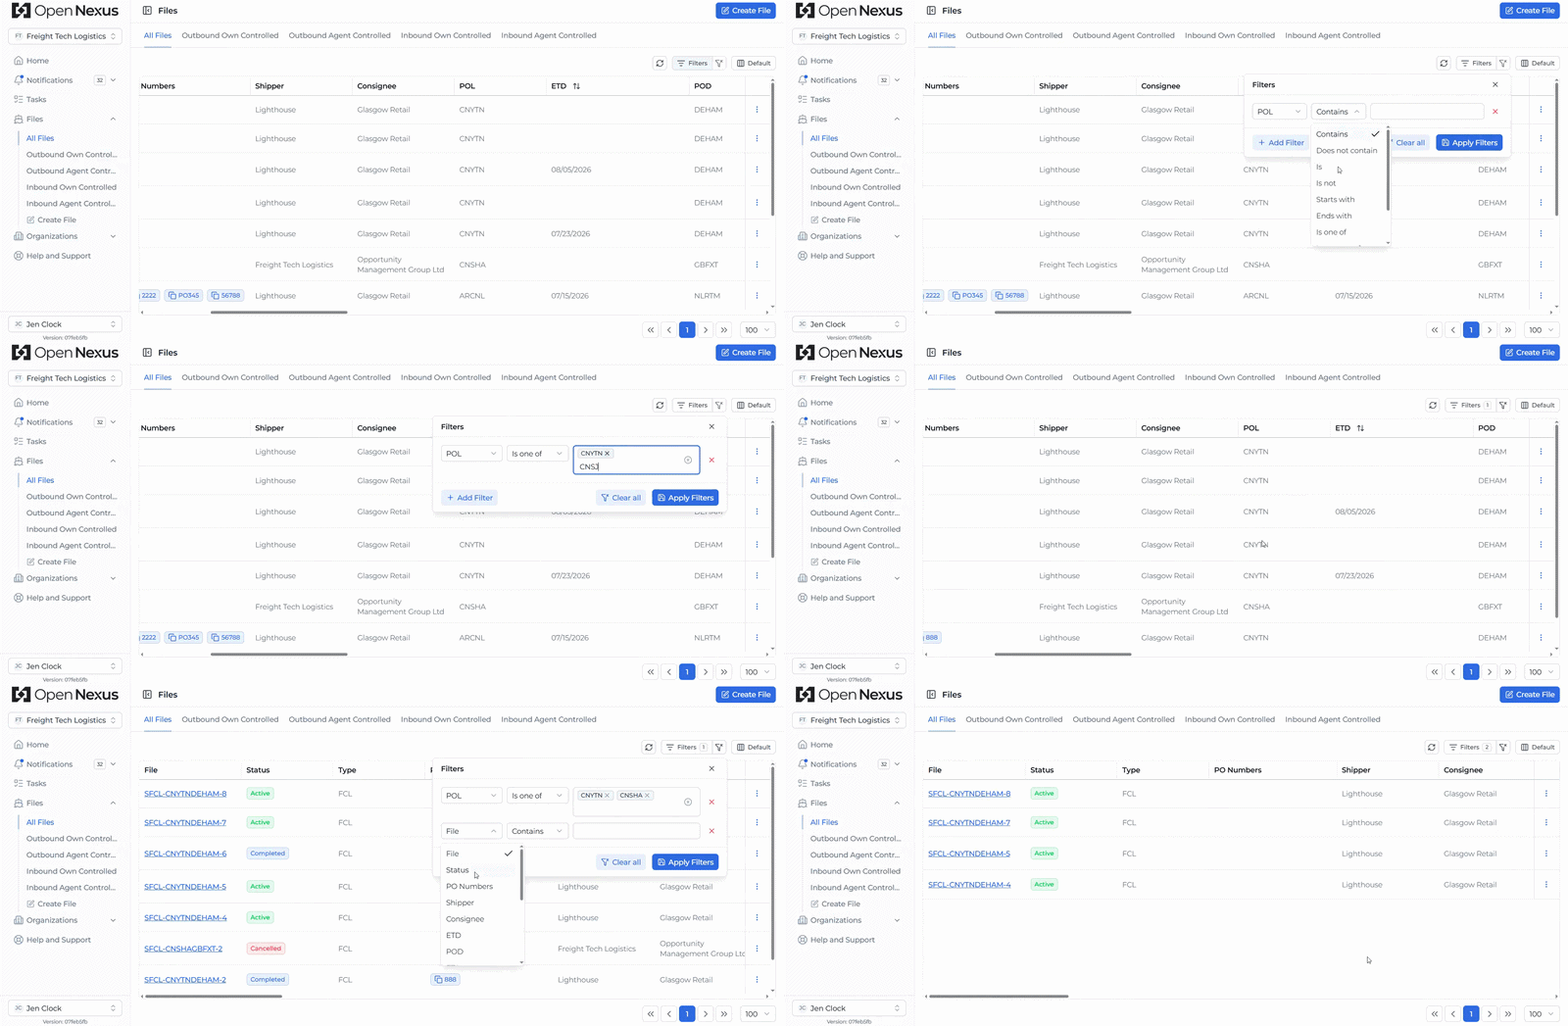
- Open the table you want to filter.
- Click the Filter option.
- Select the field or column you want to filter.
- Select the appropriate filter condition.
- Enter or select the value you want to use.
- Apply the filter to update the table results.
Depending on the field being filtered, available conditions may include:
- Contains – Shows records containing the entered value.
- Does Not Contain – Excludes records containing the entered value.
- Is – Shows records matching the selected value.
- Is Not – Excludes records matching the selected value.
- Is One Of – Shows records matching any of the selected values.
- Is Not One Of – Excludes records matching any of the selected values.
The available filter conditions depend on the type of field being filtered.
Hint:
Apply multiple filters to narrow down your results further. If you want to keep the filters for future use, apply them to a Saved View.
Sorting
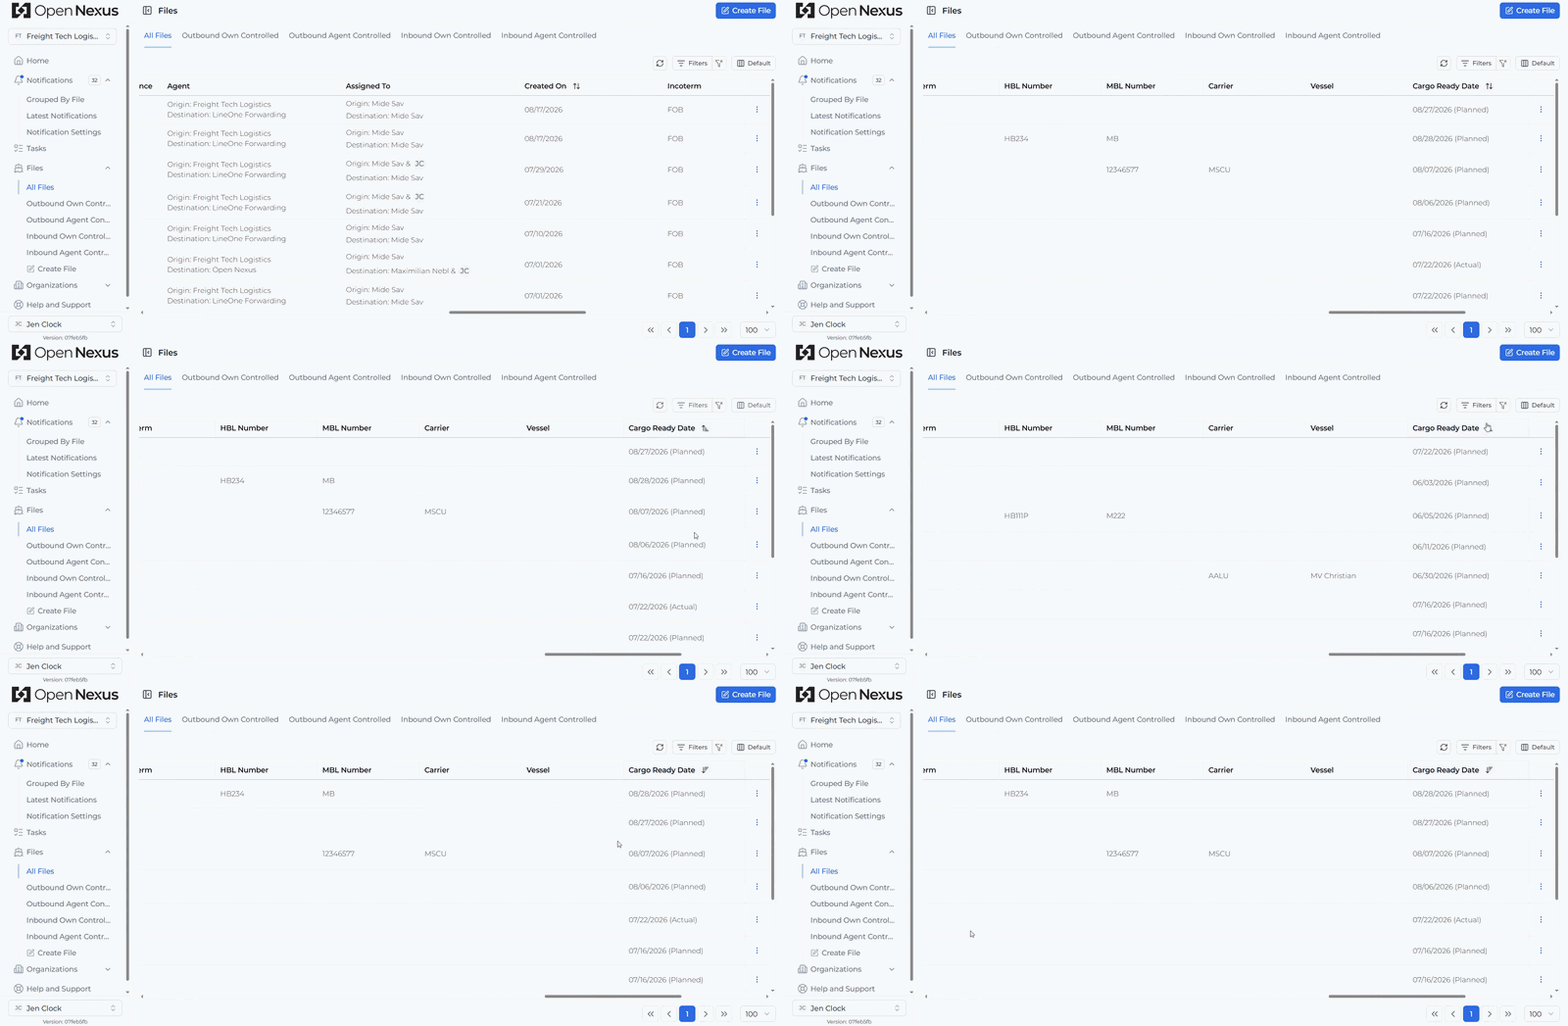
Sorting allows you to control the order in which records are displayed and is particularly useful for date and timestamp columns.
Open Nexus supports multi-sorting, allowing you to sort by multiple columns at the same time. Select the sorting option on the relevant columns and choose the available order, such as showing the newest or oldest records first.
When sorting is active on a column, the column header is highlighted in grey and displays the sorting icon, making it easy to identify which columns are currently being used for sorting.
Where Saved Views are supported, your selected sorting can be retained as part of your Saved View configuration.
To reset sorting, click the dedicated Reset Sorting & Column Sizes button. This resets the applied sorting and column width adjustments.
The Reset Sorting & Column Sizes button is separate from the Clear Filters button, which only removes the filters currently applied to the table.
Hint:
Use sorting together with filters to prioritize time-sensitive information, such as recently updated records or upcoming activities.